
Setting Up Product Personalization
Personalization lets you collect custom details from shoppers, like a name, a font choice, or an uploaded image, and attach that information to a specific product inside a bundle. It's a good fit for gift sets, monogrammed items, or any product where you want the shopper to make a choice before it's added to their bundle.
Before you start
- Personalization is a gated feature. If you don't see it, reach out to support to have it enabled for your store.
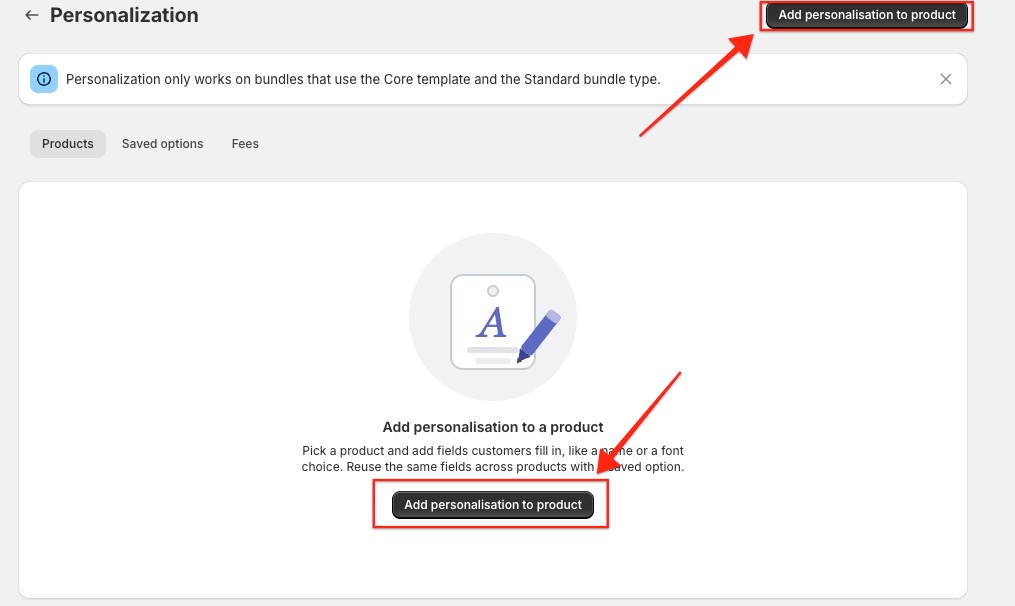
- Personalization only works on bundles that use the Core template and the Standard bundle type. It won't appear on other bundle types or templates, so confirm your bundle is set up this way before configuring personalization for its products.
Getting to the Personalization page
- In your Kitenzo admin, go to Settings.
-
Select Personalization.
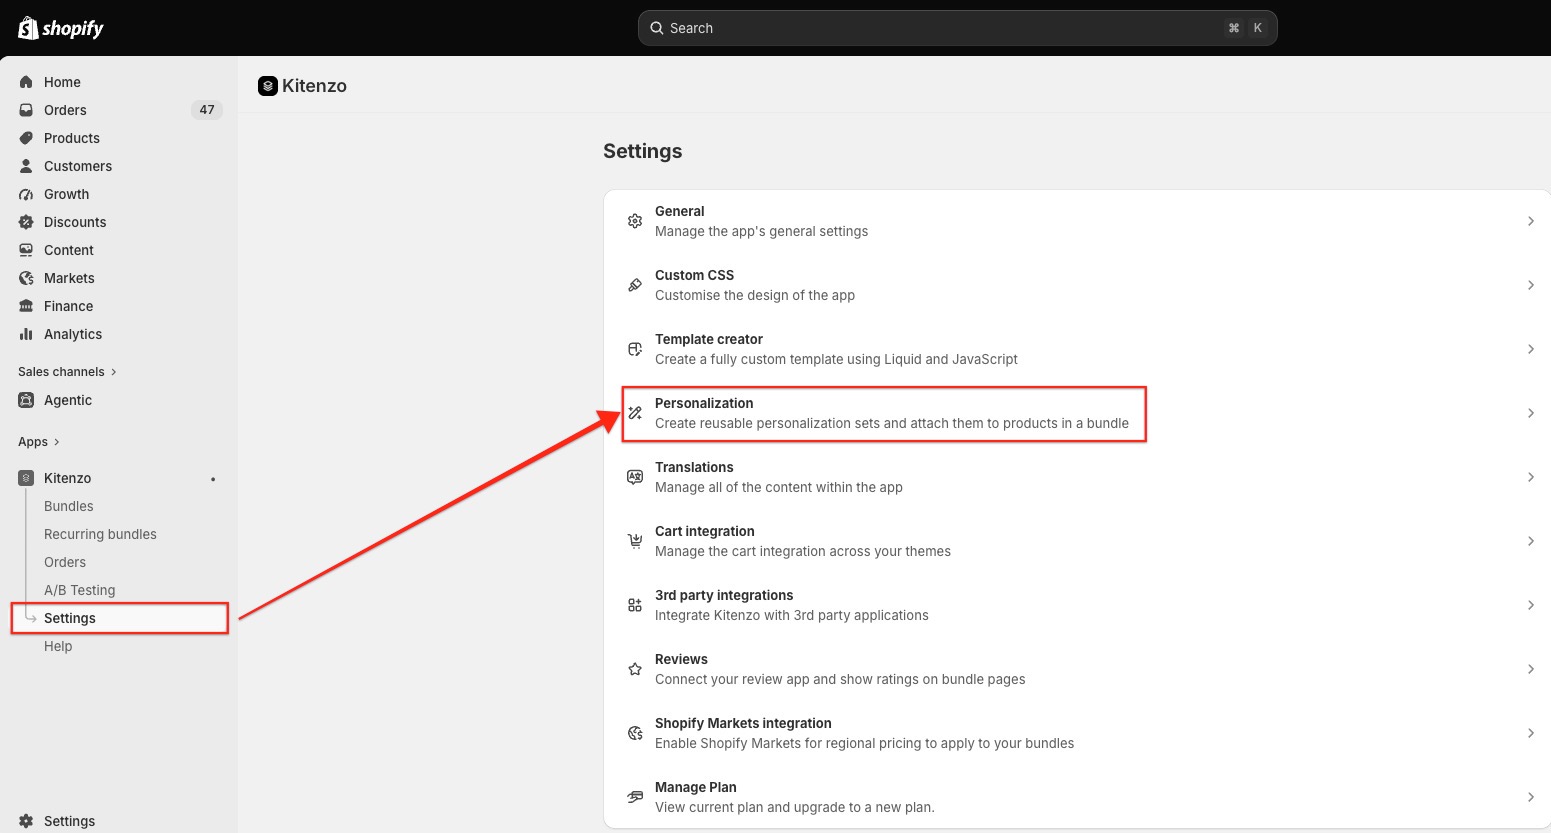
- You'll land on the Products tab. If your account also has upcharge fees enabled, you'll see a third tab called Fees alongside Products and Saved options.

Adding personalization to a product
-
From the Products tab, select Add personalization to product.
-
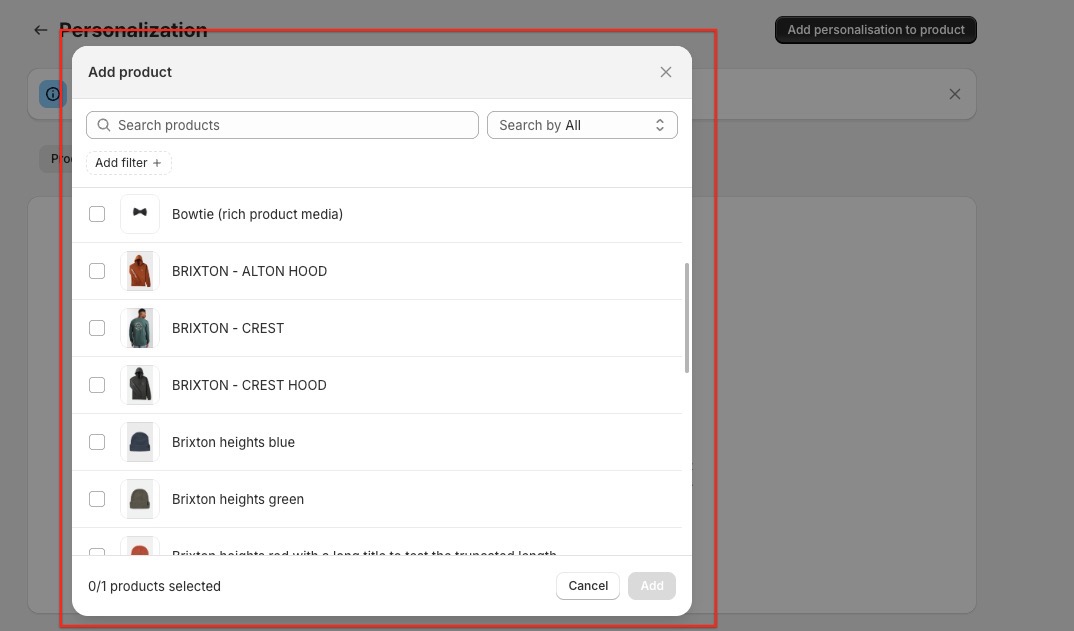
Pick a product from the picker that opens. (Bundle "ghost" products aren't shown, since they can't carry personalization themselves.)
- You'll land on that product's editor, where you choose one of two approaches:
- Custom fields — build a one-off set of fields just for this product.
-
Saved option — apply an existing reusable set (see below) instead of building fields from scratch.

- Choosing one approach replaces the other if you switch later — a product can only use one source of personalization at a time.
Configuring fields
Whether you're building custom fields for one product or creating a Saved option, the field editor works the same way. For each field you add:
- Choose a field type:
- Text — a free-text box (you can set a character limit).
- Dropdown — a list of options the shopper picks from.
- Checkbox — a simple yes/no choice.
- Image — lets the shopper upload their own image.
- Enter a Label for the field. This is what the shopper sees, and it also becomes the property name attached to the order — so try to get it right before saving, since renaming it later won't change that underlying reference.
- Labels must be 100 characters or fewer, can't start with an underscore, and must be unique within the same set.
- Optionally add:
- A Placeholder (up to 100 characters).
- Help text shown beneath the field (up to 500 characters).
- For Text fields only, a Character limit for the shopper's input.
- For Dropdown fields, a list of Options (one per line, up to 50 options, each up to 100 characters).
- Toggle Required if the shopper must fill this in before adding the product.
- If upcharge fees are enabled for your store, you can also select a fee to charge when the shopper fills in this field (see "Setting up upcharge fees" below).
- You can add up to 10 fields per product or Saved option.

Promoting custom fields to a Saved option
If you've built a one-off set of custom fields on a product and want to reuse it elsewhere:
- From that product's editor, select the option to promote the field set.
- Give the new Saved option a name.
- The fields move into a reusable Saved option, which you can then attach to other products from the Saved options tab.
Creating and managing Saved options
Saved options are reusable field sets you can attach to many products at once. Editing a Saved option updates every product that uses it.
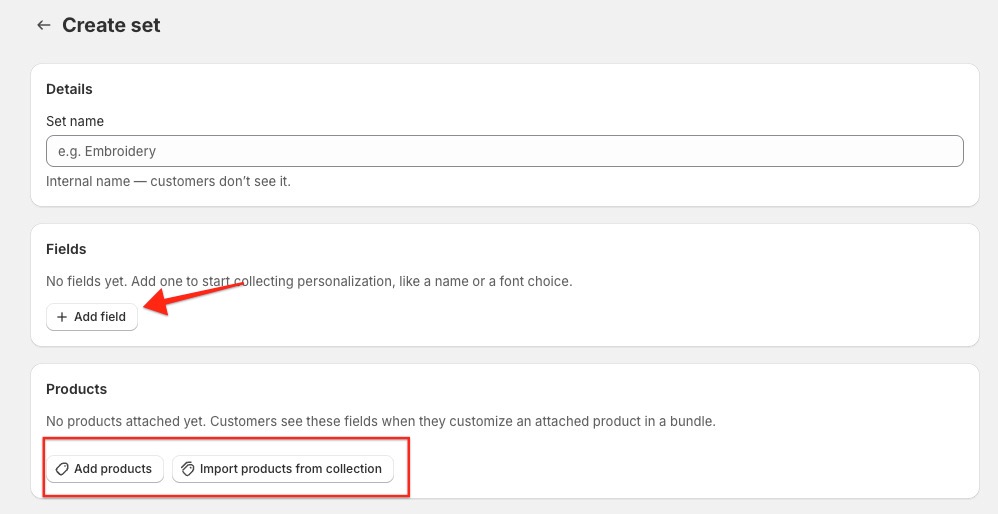
- Go to the Saved options tab and select Create saved option.
- Name the option and configure its fields as described above.
- Attach products to it:
- Use the product picker to select products individually (you can select multiple at once), or
-
Select Import from collection to pull in every product from a chosen collection that's published to your Online Store. This is a one-time import — later changes to the collection won't automatically sync.
- If a product you try to attach is already using a different Saved option, you'll see a banner letting you move it to this set instead. This detaches it from the old set automatically.
- Save your changes.
To delete a Saved option, use the delete action in its editor. Deleting it removes personalization from every product currently attached to it, so double-check the attached product list first.
Setting up upcharge fees (optional)
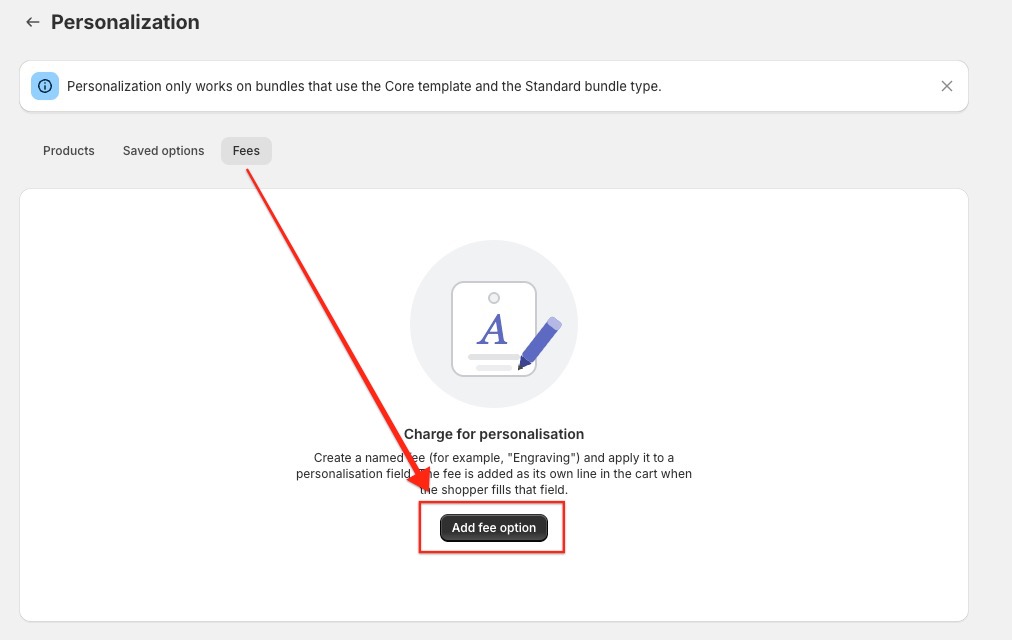
If your store has upcharge fees enabled, you'll see a Fees tab where you can maintain a catalogue of fee options to charge for personalization.
-
Go to the Fees tab and select the option to add a new fee.
-
Enter a Name, an Amount, whether it's Taxable.
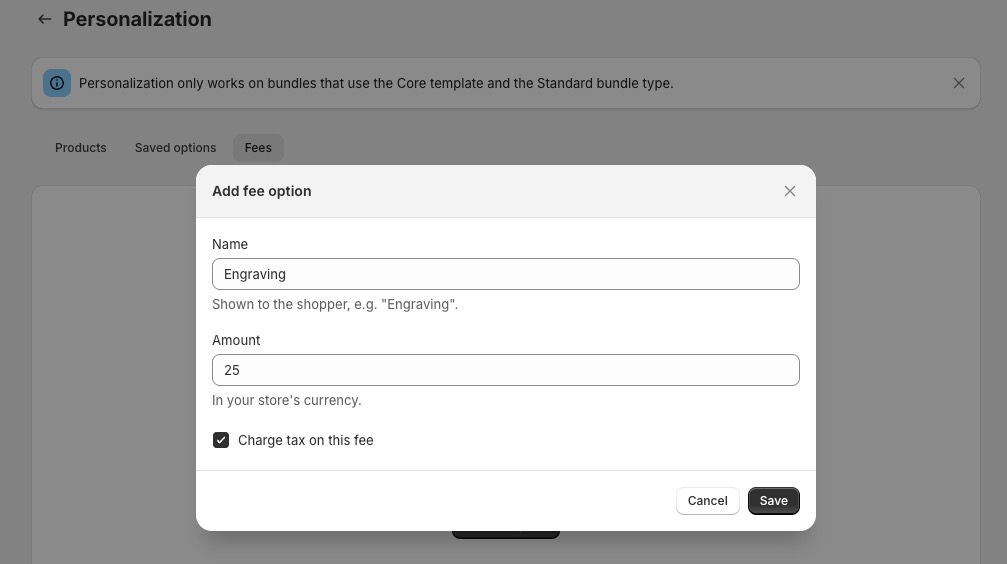
- Save the fee. It's now available to select on any personalization field.
- When editing a field (on a product or a Saved option), choose the fee it should charge when the shopper fills it in.
When a shopper fills in a field with a fee attached, that fee is added to their cart as its own line item labeled "Personalization fee," separate from the product itself. This keeps bundle discounts from applying to the fee, and the order shows which product the fee belongs to.
Key considerations and tips
- Personalization only appears on bundles using the Core template and the Standard bundle type. If you've set up personalization but shoppers don't see it, check the bundle's template and type first.
- A product can only have one source of personalization at a time — either its own custom fields or one Saved option, never both.
- Editing or deleting a Saved option affects every product attached to it, so review the attached products list before making changes.
- Field labels double as the property name recorded on orders. Once a field is created, renaming its label later won't change that underlying reference, so it's worth finalizing labels early.
- The Import from collection action only pulls in products published to your Online Store, and it's a one-time snapshot — products added to the collection afterward won't be included automatically.
- Shoppers see a "Customize" prompt (often shown with a personalization badge) on eligible products in the bundle builder, and their entered values, along with any fee, carry through to the cart, checkout, and the final order.